Shallot
Allium ascalonicum
_(2).JPG)
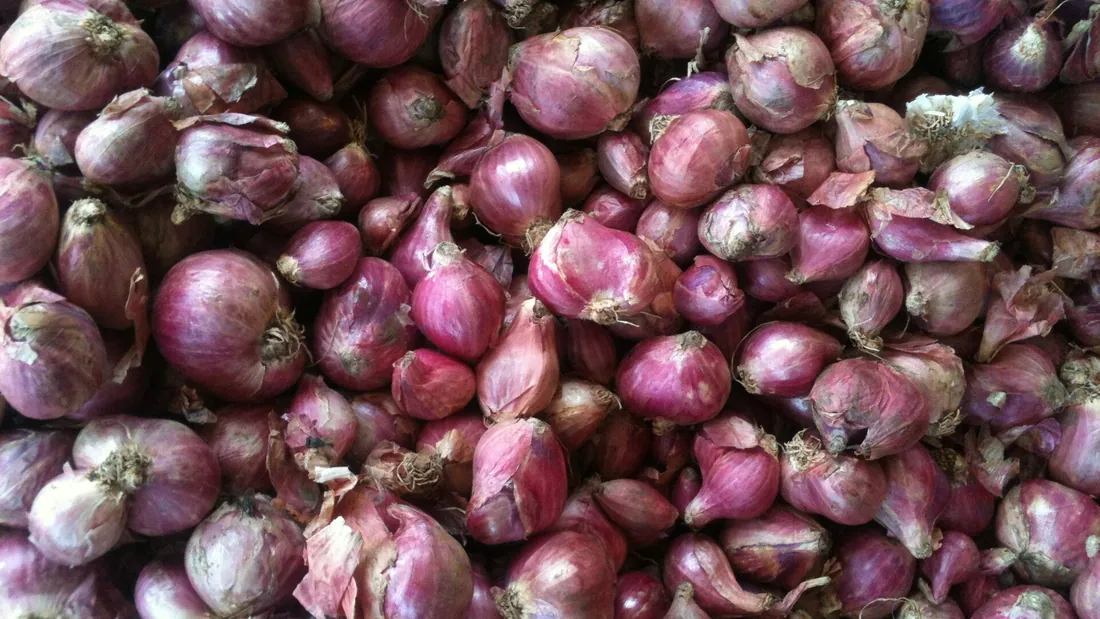
The shallot (Allium ascalonicum) is a classic of the vegetable garden, a cousin of the onion but with a finer, milder flavour. Unlike most vegetables in the plot, it is almost never grown from seed. Instead you plant sets, small dry bulbs, and each one grows into a cluster of several shallots fused together at the base. A single set can multiply into six to eight bulbs by harvest time, which makes it one of the most rewarding crops in the garden.
Light and exposure
Shallots want as much sun as possible. Plant them in the most open, brightest spot in the vegetable garden, away from large trees and hedges that cast shade for part of the day. The less light they get, the smaller the bulbs stay and the more the foliage shoots upward without the harvest following.
A spot open to the wind is not a problem, quite the opposite. Moving air limits stagnant moisture on the foliage and keeps away the fungal diseases that lie in wait for alliums during a rainy summer.
Watering
Shallots do not like too much water. Moderate watering during the growing period, only when the soil is genuinely dry, is more than enough. Soil that stays waterlogged makes the developing bulbs rot, especially in heavy soil that drains poorly.
The important move comes at the end of the cycle. As soon as the foliage starts to yellow and flop over, stop watering completely. The bulbs need to finish ripening and drying where they stand, and too much water at this stage ruins their keeping quality over winter.
Soil and repotting
Light, loose, well-drained soil is essential. Shallots hate heavy, clay-rich ground that holds water around the bulb. On sticky soil, work it deeply in autumn and lighten it with coarse sand or well-rotted compost.
One important point: never plant into freshly manured ground. Fresh manure rots the sets and pushes the plant into leaf growth at the expense of the bulbs. Soil that was enriched the previous year, for an earlier crop such as tomatoes or courgettes, suits the shallot that follows in the rotation perfectly.
Temperature and humidity
Shallots are a hardy crop that copes well with hard frost, taking around -15 °C once well rooted. That is even an advantage for the autumn-planted varieties, which overwinter in the ground without any special protection. A passing cold snap does not trouble them.
Growth really gets going once temperatures climb in spring, between ten and twenty degrees. Bulb formation is then triggered by the lengthening days, which is why planting too late gives puny bulbs: the plant simply has not had time to develop before the days start shortening again.
Pruning and upkeep
Shallots are not pruned as such. The only regular task is careful weeding between the rows, by hand if possible, since the roots sit close to the surface and hoeing too deep risks damaging the developing bulbs.
If flower stalks appear, which happens now and then on old sets or after a late cold snap, cut them off as soon as you spot them. Running to flower diverts the plant’s energy into seed rather than into swelling the bulb.
Pests and diseases
Onion downy mildew, which also affects shallots, shows up as elongated greyish patches on the foliage, which eventually collapses. It develops mainly in mild, humid weather, and correct spacing between plants along with well-drained soil clearly cuts the risk.
White rot, caused by a soil fungus called Sclerotium cepivorum, is more insidious. It attacks the roots and the base of the bulb, which rots away with no visible sign above ground until it is too late. Onion fly rounds out the trio to watch for, its larvae tunnel through the bulbs from the inside. In all three cases, the best defence is crop rotation: never replant alliums in the same spot for at least three to four years.
Propagation
Shallots multiply almost exclusively from sets, the small dry bulbs you can buy at the garden centre or keep back yourself from one harvest to the next. Each set planted divides in the ground into a cluster of several bulbs, which is the plant’s natural way of reproducing.
Each year, set aside your best bulbs, not necessarily the biggest but the healthiest, to replant the following season. This is how gardeners have long passed down their grey varieties for generations, a single line of shallots can carry on in the same garden for decades.
Climate and hardiness
Where and in which climate it thrives
Shallots are fully hardy: once rooted, they take frosts down to around -15 °C, and the crop is commonly grown from USDA zone 4 to 9. An old saying sums up the calendar wherever winter stays workable: plant on the shortest days, harvest on the longest. So it is not cold that dictates the timing, but two other things. The first is water: under a mild, rainy winter, in heavy soil that stays sodden for weeks, the sets rot before they even get going, where a dry frost leaves them untouched. A ridge ten to fifteen centimetres high and full sun are worth more than any protection against cold, and on heavy ground a planting postponed to the end of winter, once the soil has drained, beats a waterlogged autumn planting. Under a very wet oceanic climate it also pays to start from certified virus-free sets rather than replanting your own bulbs year after year, as soil-borne disease pressure is higher there than under a dry climate. The second factor is day length, which triggers bulbing far more than heat does. Long-day varieties only bulb above fourteen to sixteen hours of daylight and suit temperate latitudes; under a subtropical or tropical climate, where the day barely exceeds thirteen hours, they stay in leaf and short-day varieties are needed instead. Under a harsh continental winter, an autumn planting is covered with a dry mulch or postponed to the very end of winter, as soon as the ground has drained. Under dry heat, above 25 °C late in the cycle, the foliage dries off quickly and harvest comes a few days earlier.
Growing shallot?
Green Hub keeps a dated history of your own plant: its photos, its progress, its repottings. An AI answers about yours specifically, not a generic sheet, for free.
Identify my plantMonth-by-month care calendar
| January | Nothing to plant this month if the soil is frozen. If an autumn planting is already in the ground, check it has not been waterlogged by winter rain. |
|---|---|
| February | Late winter, the last window to plant long-keeping varieties once the soil drains and is no longer frozen. |
| March | Main planting of sets, pointed end up, just level with the surface, in soil that is loose but has not been freshly manured. |
| April | The first green shoots come through. Weed by hand between the rows, the roots sit close to the surface. |
| May | Active leaf growth. Water moderately if spring is dry, but never waterlog the soil. |
| June | Bulbs swell underground. The foliage sometimes starts yellowing towards the end of the month, depending on variety and weather. |
| July | Main harvest as soon as the foliage yellows and flops over. Stop watering and lift on a dry day. |
| August | Dry the harvested bulbs in the sun or in a ventilated spot for one to two weeks before storing them. |
| September | Sort the dried bulbs, discard any damaged ones and set aside the best as sets for autumn planting. |
| October | Prepare the plot for autumn planting, soil loosened but not manured, and well drained. |
| November | Autumn planting of hardy varieties, wherever the soil still allows it. |
| December | Rest in the garden. Store the bulbs somewhere dry, away from frost and damp, ready for the late-winter planting. |
Green Hub tips
- Never plant shallots into freshly manured ground. Fresh manure rots the sets, so choose a spot that was enriched the year before.
- Push the sets in pointed end up and just level with the surface, never fully buried, or they will either push themselves back up or rot below ground.
- Always let the bulbs dry in the sun for a few days after harvest before storing them, otherwise they will not keep through winter.
- Never replant shallots or other alliums in the same spot within three to four years, it is the best protection against white rot.
Related species
Chives
Allium schoenoprasum
Chives (Allium schoenoprasum) are a small perennial of the onion family, with fine hollow stems tasting mildly of…
Clivia
Clivia miniata
The clivia (Clivia miniata) is a sturdy, generous houseplant from the undergrowth of South Africa. Its broad strap-like…
Daffodil
Narcissus
The daffodil (Narcissus) is the first big signal of spring in the garden. Long before the tulips, its yellow trumpets…
Garlic
Allium sativum
Garlic (Allium sativum) is one of the easiest vegetables in a kitchen garden, provided you grasp two things. You don’t…
Leek
Allium porrum
The leek (Allium porrum) is the winter vegetable par excellence. Very hardy, it stands in the ground all winter and is…
Onion
Allium cepa
The onion (Allium cepa) is a hardy, no-fuss bulb vegetable, one of the easiest crops to succeed with in a vegetable…
The guides that mention it
Updated on
How this sheet is written
Written for Green Hub with the help of language models, then reviewed. It offers gardening guidance, not professional advice: if you are unsure whether a plant is toxic to a child or an animal, ask a vet, a doctor or your national poison centre.