Bay laurel
Laurus nobilis
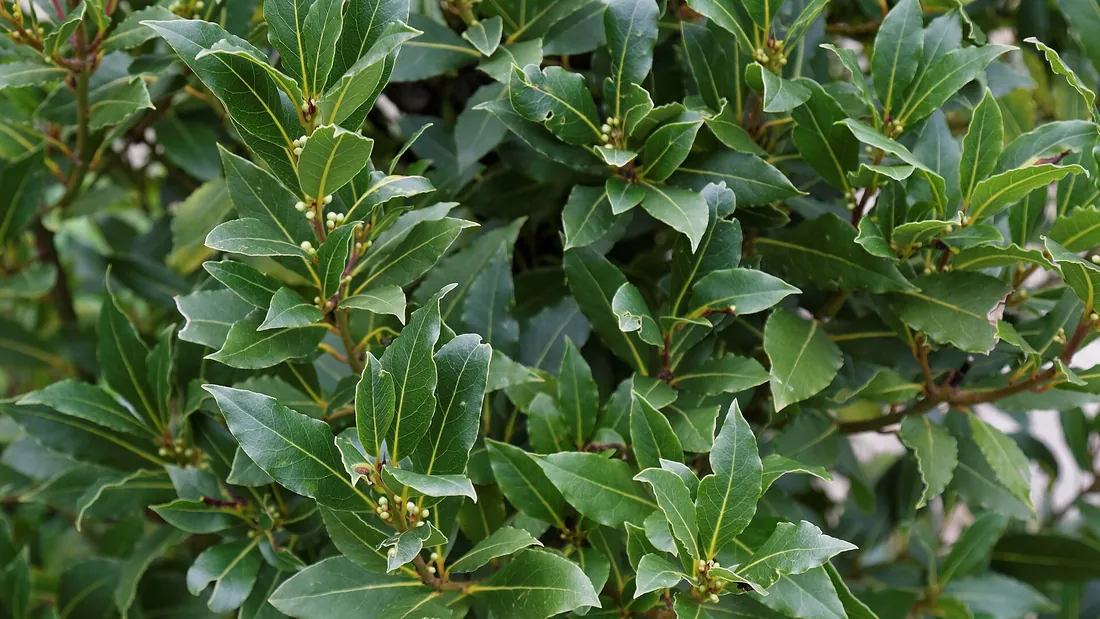

Bay laurel (Laurus nobilis) is the only true culinary bay, the one whose leaf you drop into sauces and stocks. Take care never to confuse it with cherry laurel (Prunus laurocerasus) and oleander (Nerium oleander), two toxic ornamental shrubs that have no place on a plate. It is a semi-hardy evergreen shrub, at home from USDA zone 8 upwards: an established specimen takes a mild winter, but young plants and hard cold snaps scorch it. Anywhere colder, safety comes down to one word: the pot, which you bring under cover.
Light and exposure
Bay laurel likes the sun, with a good tolerance for partial shade wherever the summer is less punishing than in the Mediterranean. In open ground, choose the most sheltered and warmest corner of the garden, ideally at the foot of a wall that catches the midday sun, stores the day’s heat and breaks the prevailing cold winds. The more light it gets, the denser and more fragrant the foliage.
In a pot, you gain the freedom to move it: full sun on the terrace through the growing season, then a bright shelter for winter. Avoid dark, confined corners, where it grows spindly and attracts scale insects and diseases. A little afternoon shade does not bother it, especially during dry summers.
Watering
Bay laurel likes neither prolonged drought nor wet feet. In open ground, an established specimen more or less manages on its own once rooted, except during the long dry spells of summer when a generous watering every eight to ten days helps it hold on. Water at the base, in the morning.
In a pot it is more demanding: the substrate dries out quickly and needs water regularly in summer, sometimes twice a week in strong heat. Let the top few centimetres dry out between waterings and always empty the saucer. In winter, under cover, cut back sharply: the pot must stay barely moist, never waterlogged, otherwise the roots rot.
Soil and repotting
Bay laurel above all requires a free-draining soil. It grows in almost any garden soil provided the water does not stagnate: a heavy soil waterlogged all winter is its worst enemy. Lighten it at planting with coarse sand or gravel if your soil is clayey, and plant preferably on a small mound.
In a pot, mix a good potting soil with a third of sand or perlite to guarantee drainage, and put a layer of clay pebbles at the bottom. Repotting is done in early spring, every two or three years, into a container barely larger: the laurel does not like too generous a volume all at once. Plant or repot when growth picks up strongly, not before.
Temperature and humidity
This is the sensitive point as soon as you move away from its native range. Bay laurel is semi-hardy: it is at home in USDA zones 8 to 10, that is a winter minimum of the order of -12 to -7 degrees. The first damage, scorched leaves and brown margins, shows around -7 degrees on a young plant. A well-established specimen in a sheltered spot takes -10 to -12 degrees losing only part of its foliage, which starts again in the growing season. Below that, or through a long damp winter, it suffers badly and may lose all its leaves, even die back to the roots, from which it often regrows.
Young plants are far more fragile and will not get through a real winter outside on their own without protection. In zone 7 and colder, two strategies: either the pot, brought in as soon as the first frosts are forecast into a cold, bright, frost-free shelter (bright garage, unheated veranda, cold greenhouse) at 2 to 8 degrees; or open ground in a very sheltered spot, base mulched and crown wrapped in horticultural fleece during announced cold snaps. Stagnant moisture in winter weakens it as much as dry cold.
Pruning and upkeep
Bay laurel takes pruning very well and withstands severe cuts, which makes it a classic for topiary in balls, cones or standards. Shaping pruning is done in spring, in April-May, once the frosts have passed, and touched up lightly at the end of summer. Cut just above a leaf, with clean secateurs. Its growth is slow, count on patience rather than on the shears.
Routine care stays light. Remove the dead wood and the branches scorched by the cold in spring, when you see what is really regrowing: do not cut too early, the laurel buds late and a branch that seems dead can green up again in May. An addition of mature compost or organic fertiliser in spring supports growth, especially in a pot where the substrate becomes exhausted.
Pests and diseases
Bay laurel is fairly robust as regards diseases, but two pests lie in wait for it. Scale insect is the most common, especially on potted specimens or in a confined, poorly aired spot: little brown or white cottony clusters along the stems and under the leaves. It excretes a sticky honeydew on which sooty mould settles, that black soot that dirties all the foliage. Treat early with black soap or oil, and above all air the plant.
The other regular is the bay sucker (Trioza alacris), a small sap-sucking insect tied to this plant alone: where the growing season is long it completes several generations in a year, hence the successive waves of distorted leaves from spring into autumn. The leaf margins roll up and thicken into a gall that shelters the larvae. Cut and destroy the rolled leaves as soon as you spot them to break the cycle. As for diseases, excess moisture in the soil in winter remains the real danger: it causes root rot, often fatal, far more than any foliage fungus.
Propagation
Bay laurel multiplies slowly, worth knowing before you start. The most common method is the semi-woody cutting, at the end of summer, from August to September: take stems of the year of ten to fifteen centimetres, half-ripened, remove the bottom leaves, and plant in a sandy mix kept just moist, under cover and warm. Rooting is long and capricious, several months, with a modest success rate, so put several cuttings in at the same time.
Layering is more reliable for the patient gardener: in spring, bend down a low, supple branch, bury part of it holding it with a hook, and let it happen. It will form its own roots over one or two years before being separated from the mother plant. Sowing also exists but stays reserved for enthusiasts, the seeds germinating slowly and irregularly.
Climate and hardiness
Where and in which climate it thrives
Bay laurel is a Mediterranean shrub, fully at ease in USDA zones 8 to 10, where the thermometer rarely drops below -12 degrees. The first visible damage, scorched leaves and brown margins, shows around -7 degrees on a young plant. A specimen established for a few years, in a sheltered, well-drained spot, takes -10 to -12 degrees losing only part of its foliage, and often comes back from the base when the cold has taken the branches. In zone 7 and colder, it does not get through the winter outside without serious protection.
Under a mild, damp oceanic climate, cold is not the only enemy: it is the wet winters, root ball waterlogged for weeks on end, that rot the roots and weaken the plant more surely than a few nights of dry frost. Plant on a small mound, at the foot of a wall that catches the midday sun and breaks the prevailing cold winds. Under a continental climate with a dry, harsh winter, the pot is the only reliable answer: outside in full sun through the growing season, brought in as soon as the first frosts are forecast into a bright, frost-free space between 2 and 8 degrees, a bright garage or a cold veranda, watered just enough that the root ball does not dry out. Under a Mediterranean or subtropical climate, it lives in open ground with no winter precaution at all, and it is summer drought on young plants that needs watching instead.
The calendar reads in seasons, not in dates: you plant and repot in early spring, when growth picks up strongly, you prune once the buds show what is coming back, and you move the pots outside once the last frosts have passed, reacclimatising the plant to the light for a few days in partial shade. The harvest has no season: bay is evergreen, you pick your leaf all year round, including in the depths of winter from the plant brought under cover.
Growing bay laurel?
Green Hub keeps a dated history of your own plant: its photos, its progress, its repottings. An AI answers about yours specifically, not a generic sheet, for free.
Identify my plantMonth-by-month care calendar
| January | The potted laurel sleeps in a bright, frost-free shelter. Water barely at all, just so the root ball does not dry out. Pick a few leaves along the way for cooking. |
|---|---|
| February | Still at rest. Watch for scale insects and sooty mould on the specimens brought in, confined air favours them. Air the space in mild weather. |
| March | The end of overwintering approaches. Prepare for repotting: potting soil, sand, clay pebbles. Do not put the pots out yet, the frosts come back. |
| April | The pots come back out once the worst of the cold has passed, first in partial shade to reacclimatise. Planting and repotting. Compost at the base. |
| May | Full recovery. Shaping and topiary pruning. Finally cut the wood scorched by winter, now that you see what is greening up. Watch for the bay sucker on the young shoots. |
| June | Active but slow growth. Water the pots regularly, let them dry out between waterings. Remove the leaves rolled up by the bay sucker. |
| July | Full season outdoors, full sun. In a pot, water up to twice a week in strong heat. Always empty the saucer. |
| August | A good month to take semi-woody cuttings: half-ripened stems of the year, sandy mix, under cover. Keep watching for scale insects and honeydew. |
| September | A last small pruning touch-up is possible. Growth slows. Continue the cuttings started in August. |
| October | End of season outdoors. Mulch the base of specimens in open ground. Prepare the overwintering shelter for the pots. |
| November | Bring the pots in as soon as the first frosts are announced, into a bright, frost-free space. Wrap the crown of the laurels left outside in fleece in hard cold. |
| December | Winter rest. Minimal watering of the pots brought in. Harvest the leaves as needed, the laurel stays evergreen even in winter. |
Green Hub tips
- Only one laurel is edible, Laurus nobilis. The cherry laurel and the oleander in the garden are toxic: never pick a leaf without being sure of the species.
- Outside mild-winter regions, the large pot brought in for winter is the best life insurance. A young plant left outside will not get through a real winter without protection.
- Do not prune too early in spring. The laurel buds late: a branch that looks dead in early spring can green up again a few weeks later.
- Air the plant well and avoid confined corners. Scale insect and its sticky black sooty mould settle mainly on cramped, poorly ventilated specimens.
Related species
Basil
Ocimum basilicum
Basil (Ocimum basilicum) is an annual, cold-sensitive herb that comes from the warm regions of Asia. It is a summer…
Chervil
Anthriscus cerefolium
Chervil (Anthriscus cerefolium) is a fine annual herb with finely cut foliage and a delicate, slightly aniseed flavour.…
Chives
Allium schoenoprasum
Chives (Allium schoenoprasum) are a small perennial of the onion family, with fine hollow stems tasting mildly of…
Coriander
Coriandrum sativum
Coriander (Coriandrum sativum) is an annual herb grown for both its fresh leaves, with their pronounced flavour, and…
Dill
Anethum graveolens
Dill (Anethum graveolens) is an annual herb with a lacy outline, a cousin of the carrot and fennel. It is a warm-season…
Lemon balm
Melissa officinalis
Lemon balm (Melissa officinalis) is a hardy perennial with crinkled foliage that gives off a lemon scent the moment you…
The guides that mention it
Updated on
How this sheet is written
Written for Green Hub with the help of language models, then reviewed. It offers gardening guidance, not professional advice: if you are unsure whether a plant is toxic to a child or an animal, ask a vet, a doctor or your national poison centre.