Clematis
Clematis
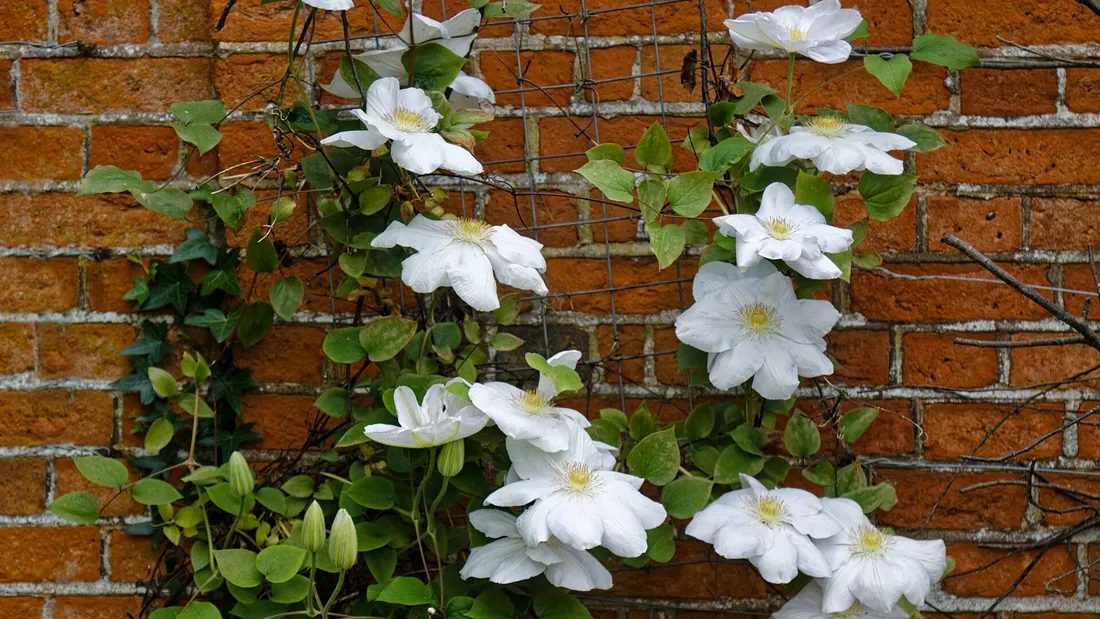

Clematis is the queen of flowering climbers, able to cover a wall, a trellis or an old apple tree with hundreds of blooms in a single season. It thrives in almost any temperate-climate garden, as long as you respect its golden rule: head in the sun, feet in the shade. The real trap is not growing it but pruning it. Every clematis belongs to one of three groups that are pruned differently, and getting the group wrong is behind most disappointing flowering seasons.
Light and exposure
Clematis wants its head in full sun or bright partial shade, with at least five to six hours of light a day to flower well. A wall that catches the morning and midday sun suits it perfectly, provided you never neglect what happens at ground level.
Its roots, on the other hand, hate direct heat and drying out. Mulch generously at the base or plant a low perennial in front of it, a hardy geranium, a hosta, or simply a few flat stones, to keep the roots cool and shaded while the foliage climbs towards the light.
Watering
The first two years after planting are decisive. Clematis builds a deep root system and needs soil that stays consistently moist without ever being waterlogged. Water generously once or twice a week in summer rather than a little every day, the water needs to reach deep to encourage the roots downward.
Once well established, clematis copes better with dry spells, but a plant in a pot or against a wall sheltered from rain stays vulnerable throughout its life. A thick mulch at the base clearly reduces watering needs and protects the shallow roots.
Soil and repotting
Clematis likes soil that is fresh, rich and well drained, ideally neutral to slightly alkaline. Soil that is too acidic slows its growth, a yearly dose of well rotted compost and, if needed, a little lime or wood ash are usually enough to correct that.
Avoid heavy soil that stays waterlogged in winter at all costs, roots rot quickly in airless ground. In clay or clay-limestone soil, which many gardens have, plant with the rootball slightly raised and work in compost and some coarse sand to open up the structure.
Temperature and humidity
Most large-flowered clematis are perfectly hardy, down to around -25 °C, which means USDA zones 4 to 9, and sail through the winter outdoors without any protection once mature. Clematis montana does not go quite so low, more like zones 6 to 9, and evergreens of the Clematis armandii type want a mild winter. First year plants, however, benefit from a good mulch at the base over winter while the roots settle in.
The real risk is not winter cold but late frosts, which can scorch tender young shoots once growth has restarted. Keep a fleece within reach until your local frost season is properly over.
Pruning and upkeep
Pruning is what puts off most beginners, even though the rule is simple once you know your group. Before the secateurs come out, work out which group your clematis belongs to, the plant label usually says so, otherwise you can work it out from the flowering time and the species.
Group one flowers in spring on the previous year’s wood, this is Clematis montana and the small flowered spring clematis. Prune these lightly, just to tidy the shape, straight after flowering, never during winter dormancy or you cut off next year’s flowers. Group two covers the large flowered types that bloom in late spring and early summer and often flower again more modestly in late summer, classic hybrids such as Nelly Moser. Prune these lightly in late winter, before the buds swell, keeping the framework and removing only dead wood and stray stems. Group three flowers in summer and autumn on the current year’s growth, viticella and jackmanii are the typical examples. These can be cut back hard in late winter, to around thirty centimetres from the ground, without any worry, they come back vigorously and will still flower the following summer.
Pests and diseases
The great scourge of clematis is wilt, caused by a fungus in the genus Calophoma, once known as Ascochyta clematidina. A whole stem collapses suddenly, sometimes within days, while the rest of the plant looks perfectly healthy. It looks dramatic and it worries people, but it is almost never fatal.
Cut the affected stem right down at ground level, or a little below, and bin that wood rather than composting it. The plant very often comes back from the crown or the roots within a few weeks. Planting the rootball a few centimetres deeper than it sat in its pot, burying a node or two, helps a great deal with recovery after an attack, since the plant then has backup buds underground. Slugs also happily attack tender young shoots in spring, protect them until the growth has hardened off.
Propagation
Layering is the simplest and most reliable way to multiply a clematis that is already established. Bend a flexible stem down into a shallow trench in the soil, leaving the tip poking out, hold it down with a stone or a peg, and cover it with soil at a node. The layer roots within a season, and can then be separated from the parent plant.
Cuttings also work but need more care, take a semi ripe cutting at a node in high summer, with a single pair of leaves cut in half, and keep it in a humid, enclosed spot until it roots. Sowing is only useful for species clematis, hybrids never come true from seed.
Toxicity
The fresh sap is irritating to skin and mucous membranes on contact, and the whole plant is toxic if eaten, causing digestive upset such as mouth irritation, nausea and vomiting. Wear gloves when pruning and keep children and pets away from the fresh sap.
Climate and hardiness
Where and in which climate it thrives
Most large-flowered clematis are remarkably hardy: they take around -25 °C and grow in USDA zones 4 to 9, sharp continental winters included. Not all are equal, though. Clematis montana is more tender, more like zones 6 to 9, and evergreen clematis such as Clematis armandii rarely hold below -10 °C, so keep those for mild winters. A mature hardy clematis winters outdoors with no protection at all; a first year plant appreciates a good mulch at the base.
The real risk is not winter cold but late frosts, which scorch young shoots that have already started into growth. Keep a fleece within reach until your local frost season is properly over.
As for heat, this is a temperate climate plant: head in the sun, feet in cool shade, and that rule turns into a serious constraint as soon as summers are hot and dry. In a Mediterranean climate, or a continental one with scorching summers, pick a spot that cuts the afternoon sun, mulch thickly and water deeply rather than often. In a mild, rainy oceanic climate the problem flips: it is the waterlogged winter that kills the roots, never the cold, and on heavy ground the rootball goes in slightly raised. Finally, in a subtropical climate with no real cold spell, most large-flowered hybrids flower poorly, for want of the marked winter rest they need.
Growing clematis?
Green Hub keeps a dated history of your own plant: its photos, its progress, its repottings. An AI answers about yours specifically, not a generic sheet, for free.
Identify my plantMonth-by-month care calendar
| January | Complete rest. Use the time to work out the pruning group of every clematis in the garden and order new varieties to fill any bare walls. |
|---|---|
| February | Time to prune groups two and three, just before the sap rises. Cut group three back to about thirty centimetres from the ground, lighten group two while keeping its framework. Leave group one alone. |
| March | Plant bare root or container grown clematis now if you have not already, burying the rootball a few centimetres deep. Finish any late winter pruning before the buds swell too much. |
| April | Growth picks up fast. Put stakes, string or trellis in place before the young shoots tangle themselves, they snap easily if you wait too long. Watch for late frost on tender young growth. |
| May | Group one, such as Clematis montana, finishes flowering, prune it lightly right after the last blooms fade. Group two clematis start flowering generously. Guide any stems heading off in the wrong direction. |
| June | Peak flowering for many varieties. Water generously during dry spells, especially plants under two years old. Watch for aphids on young shoots. |
| July | Group three, viticella and jackmanii leading the way, takes over with its summer flowers. Mulch now if you have not already, to keep the roots cool through the heat. |
| August | Group three flowering continues. If a stem suddenly collapses, that is wilt, cut it back to ground level, the plant almost always recovers. |
| September | Some group two hybrids give a second, more modest flowering. Keep watering in dry weather, but ease off as the nights turn cooler. |
| October | The ideal time to plant a new clematis, the soil is still warm enough to encourage rooting before winter. Mulch the base of young plants ahead of the cold. |
| November | Top up the mulch around clematis planted this year. Clear away fallen leaves from the ground, they can harbour disease. |
| December | Rest. Check that stakes and trellises are holding up against the wind, and note which group flowered best this year to plan February’s pruning. |
Green Hub tips
- Always work out your clematis’s pruning group before reaching for the secateurs, group one, two or three. Getting it wrong is the number one cause of clematis that never flower.
- Follow the golden rule: head in the sun, feet in the shade. Mulch the base or plant something low in front of it to keep the roots cool.
- Always plant the rootball a few centimetres deeper than it sat in its pot, it helps recovery after wilt and encourages new shoots from the base.
- If a stem suddenly collapses in summer, do not panic, that is clematis wilt. Cut it back to ground level, the plant almost always regrows from the crown.
Related species
Althea
Hibiscus syriacus
Althea (Hibiscus syriacus) is a hardy deciduous garden shrub that flowers when every other one has finished, from…
Beech
Fagus sylvatica
Beech (Fagus sylvatica) is the most common broadleaf tree in the temperate forests of Europe, just as happy standing…
Begonia
Begonia
Begonia is the star summer flower of window boxes, hanging baskets and shady borders. Hundreds of hybrids exist, but…
Box
Buxus sempervirens
Box (Buxus sempervirens) is an evergreen shrub that has been clipped into balls, cones and low borders in formal…
Butterfly bush
Buddleja davidii
Buddleia (Buddleja davidii), better known as the butterfly bush, is a nearly indestructible shrub that has taken over…
Cherry laurel
Prunus laurocerasus
Cherry laurel (Prunus laurocerasus) is the most widely planted evergreen hedging shrub in temperate gardens, and it is…
The guides that mention it
Pruning Flowering Shrubs and Roses: Deducing Instead of Memorising
New wood or old wood: this single question gives you the pruning time for any shrub at all, including ones whose name…
Dividing, Taking Cuttings, Sowing: Multiplying Your Plants for Free
Dividing a perennial, taking cuttings from a shrub, or sowing seed straight from the garden: the techniques that fill a…
Which flowering shrub to choose for a garden in bloom all year round
Viburnum in winter, lilac in spring, buddleia in summer, rose of Sharon in autumn: the method for stringing together…
Updated on
How this sheet is written
Written for Green Hub with the help of language models, then reviewed. It offers gardening guidance, not professional advice: if you are unsure whether a plant is toxic to a child or an animal, ask a vet, a doctor or your national poison centre.