How to Compost in an Apartment with Worm Composting
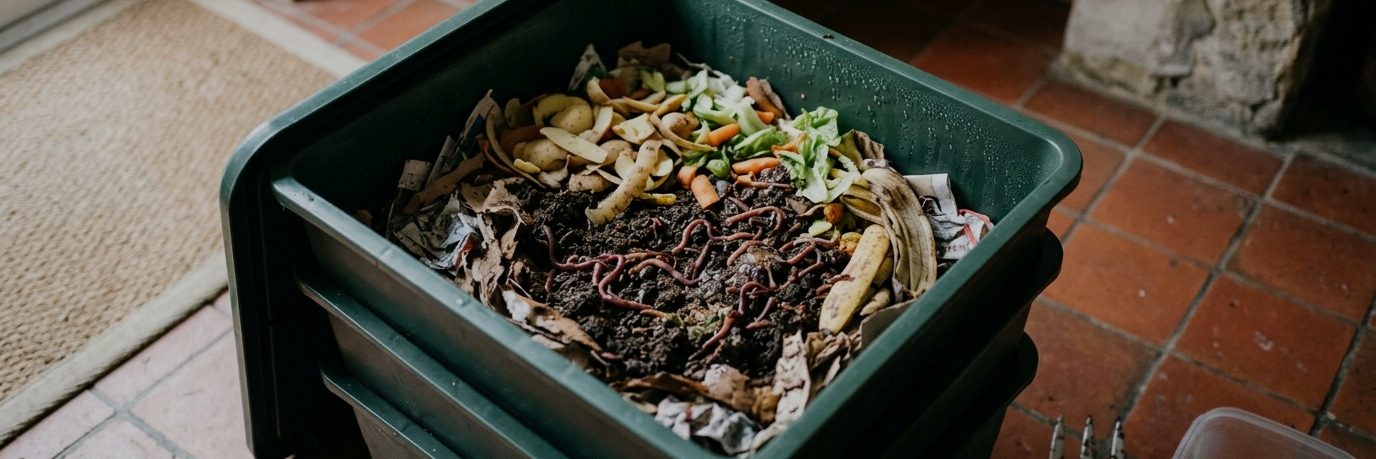
Vermicomposting means handing your kitchen scraps over to red compost worms, Eisenia fetida or andrei, housed in a tiered bin small enough for a storage room, under a sink, or on a sheltered balcony. Unlike garden composting, it needs neither a heap nor a patch of soil: within a few weeks the worms digest peelings and coffee grounds into a dark, crumbly humus called vermicompost, along with a nutrient rich liquid known as worm tea, drawn off through a tap. Properly managed, an apartment worm bin produces no smell at all, and goes on to feed houseplants and balcony planters alike.
The Tiered Bin: The Model Built for Apartments
An apartment worm bin almost always takes the form of a tiered system: several perforated trays stacked on top of a reservoir fitted with a tap, the whole unit fitting into a footprint of roughly 40 by 40 centimetres. The principle relies on the worms migrating on their own: they colonise the bottom tray where the first scraps go, then, once that level is full, move up to the next tray in search of fresh food, leaving behind a mature compost that is largely free of its former occupants.
Most kits sold in shops come with three to four trays and a base layer of pre-moistened coconut coir bedding. A recycled plastic model with a vented lid and a drainage tap remains the simplest choice for beginners; wooden versions, more attractive to look at, need closer attention to keep moisture from causing damage. Ideally, keep the bin somewhere between 12 and 25 degrees, away from frost and from strong heat: a storage room, a utility room, under a sink, or a covered balcony all work well, as long as you avoid full sun and an icy windowsill in winter.
The Red Compost Worm: Which Species, and Where to Find One
Two closely related species do all the work: Eisenia fetida, the tiger worm with yellow stripes, and Eisenia andrei, solid red, often sold together under the misleading trade name California red worm, when in fact both are cosmopolitan species found in manure heaps and surface litter. They are epigeic worms, living at the surface without digging burrows, exactly the lifestyle a shallow bin calls for. The common garden earthworm, Lumbricus terrestris, the one you turn up while digging, is by contrast an anecic worm that needs deep soil: transplanted into a bin, it quickly dies off.
To get started, plan on 250 to 500 grams of worms, a few hundred individuals, a colony that doubles in two to three months under good conditions and then regulates itself according to the space available. The easiest route is usually through a local network of master composters or a vermicomposting association, which often arrange donations between individuals; garden centres and specialist online shops also sell starter kits with worms included.
What to Put in the Bin, and How Often to Feed
Compost worms accept most raw kitchen scraps: fruit and vegetable peelings, coffee grounds along with the filter, tea bags without a metal staple, crushed eggshells, small amounts of stale bread. Always add some brown material too, torn unprinted cardboard, newspaper or dry leaves, which balances moisture and doubles as bedding; without it, the bin quickly turns into a compact sludge. Avoid meat, fish, dairy products and cooked meals, which rot before the worms can digest them, as well as excessive citrus, onion and garlic.
How often you feed matters as much as what goes on the menu. A young colony processes scraps far more slowly than an established one, which can eat close to its own body weight per day once mature: it is better to feed small amounts often in the first few weeks, burying each addition under a few centimetres of bedding. A bin piling up with uneaten scraps is the most reliable sign of overfeeding, well before any smell appears.
Odours and Fruit Flies: The Right Reflexes
A well-run worm bin gives off no smell at all, or at most a faint scent of damp woodland. An ammonia or rotting smell almost always points to too much food or too much moisture: cut back on additions for one to two weeks, mix a handful of dry cardboard or dead leaves into the top layers to soak up excess water, and check that the reservoir tap is not blocked, which would let the liquid sit and ferment at the bottom of the bin.
Small flies, fruit flies or vinegar flies, almost always move in because of scraps left exposed on the surface, where their eggs hatch within days. The habit that solves the problem in most cases: always bury each addition under a layer of damp bedding, never leave very ripe fruit exposed to the air, and lay a piece of damp cardboard over the whole surface between feedings. If an infestation has already taken hold, a small cider vinegar trap set beside the bin catches the adults within a few days while burying new scraps breaks the egg laying cycle.
Harvesting Vermicompost and Worm Tea, Then Feeding Your Plants
In a tiered bin, harvesting follows the very logic of the system: once the bottom tray holds almost no worms, all migrated to the upper levels in pursuit of fresh food, it is ready. Generally allow four to six months after starting up. The vermicompost that comes out, dark, crumbly and odourless, can be mixed in at one tenth to one fifth of the volume into potting soil, or used as a top dressing on established pots, for monstera, pothos, philodendron or any other houseplant.
The liquid that drains out through the tap, often called worm tea, is a concentrate rich in nutrients that must be diluted before use, roughly one part liquid to ten parts water, or it risks burning the roots. Use it to water your plants every two to four weeks during the growing season, spacing it out well in winter. Discard any liquid left sitting in the reservoir for several days without being drawn off: once stagnant, it loses its value. On a windowsill, cherry tomatoes and basil benefit from it just as much as the living room’s leafy plants.
The care sheets to read next
Every plant mentioned has its full sheet: watering, light, soil, pests and a month-by-month calendar.
Swiss cheese plant
Monstera deliciosa
The Monstera deliciosa, or Swiss cheese plant, is a tropical liana from Central America that has become the star of…
Pothos
Epipremnum aureum
The pothos (Epipremnum aureum), also called devil’s ivy, is a tropical vine from the Solomon Islands that has become…
Heartleaf philodendron
Philodendron hederaceum
The heartleaf philodendron (Philodendron hederaceum), also known as the sweetheart plant, is a vine from the tropical…
Snake plant
Dracaena trifasciata
The snake plant (Dracaena trifasciata), long classed under the name Sansevieria trifasciata and nicknamed…
ZZ plant
Zamioculcas zamiifolia
The ZZ plant (Zamioculcas zamiifolia) is a perennial from East Africa with upright stems lined with glossy, deep-green…
Madagascar dragon tree
Dracaena marginata
The Madagascar dragon tree (Dracaena marginata) is a houseplant with a slender trunk and a tuft of strap-like leaves…
Chinese money plant
Pilea peperomioides
The Pilea (Pilea peperomioides) is an easy houseplant, recognisable by its round, fleshy leaves that look like little…
Peperomia
Peperomia
The peperomia (genus Peperomia) brings together a large family of small houseplants with thick, fleshy foliage, such as…
Peace lily
Spathiphyllum
The peace lily (Spathiphyllum) is a tropical understorey plant from Central America, prized for its glossy green…
Rubber plant
Ficus elastica
The rubber plant (Ficus elastica) is a tree of the humid forests of Southeast Asia, grown in temperate climates as a…
Fiddle-leaf fig
Ficus lyrata
Ficus lyrata, or fiddle-leaf fig, is an African understorey tree recognisable by its large, glossy, violin shaped…
Calathea (peacock plant)
Goeppertia (anciennement Calathea)
The calathea (genus Goeppertia, long classified under Calathea), or peacock plant, brings together tropical understorey…
Prayer Plant
Maranta leuconeura
The prayer plant (Maranta leuconeura) is a houseplant with striking foliage, veined in red or marbled in light and dark…
Spider plant
Chlorophytum comosum
The spider plant (Chlorophytum comosum), also called ribbon plant, is a South African perennial that has become the…
Tomato
Solanum lycopersicum
The tomato (Solanum lycopersicum) is the queen of the vegetable garden, but it is a plant of sun and warmth that plays…
Basil
Ocimum basilicum
Basil (Ocimum basilicum) is an annual, cold-sensitive herb that comes from the warm regions of Asia. It is a summer…
Frequently asked questions
How long before the first vermicompost harvest?
Allow four to six months after starting a tiered bin that is properly fed and stocked with 250 to 500 grams of worms at the outset. The sign is easy to spot: the bottom tray empties of worms, which have moved up to colonise the levels where the fresh food is, leaving behind a dark, crumbly compost ready to be harvested.
Does a worm bin smell bad in an apartment?
No, not if it is properly maintained: a well balanced bin gives off at most a faint woodland scent. An ammonia or rotting smell almost always points to too much food or too much moisture; cutting back on additions and adding dry cardboard or dead leaves is usually enough to fix the problem within one to two weeks.
Where can you find Eisenia fetida worms?
The easiest option is to contact a local network of municipal master composters or a vermicomposting association, which often connect individuals with worm surpluses to give away. Garden centres and several specialist online shops also sell starter kits that include a few hundred grams of worms.
How do you dilute worm tea for houseplants?
Dilute the worm tea drawn off from the bin’s tap at a ratio of roughly one part liquid to ten parts water, then water your plants with it every two to four weeks during the growing season. Undiluted liquid risks burning the roots; liquid left sitting in the reservoir for several days without being drained should be discarded, since it turns and loses its value.
Green Hub looks after your plants
Photograph a plant: Green Hub identifies it and writes its care sheet, with no account. Sign in afterwards to keep its dated photos and history over time.
Identify a plantUpdated on
How this sheet is written
Written for Green Hub with the help of language models, then reviewed. It offers gardening guidance, not professional advice: if you are unsure whether a plant is toxic to a child or an animal, ask a vet, a doctor or your national poison centre.